Using the Boxes to the Right Draw
You can manipulate the Ruler by using your fingers, a mouse, or keystrokes.
 | This feature is available in PowerPoint for Microsoft 365 and PowerPoint 2019. If you don't see the Ruler on your Ribbon, see Requirements below for more details. |
Turn on the Describe tab to run into the Ruler
-
Open File > Options.
-
Tap the Customize Ribbon tab in the Options dialog box.
-
In the box on the right side of the dialog box, tap the check box named Draw.
-
Click OK to shut the Options dialog box.
-
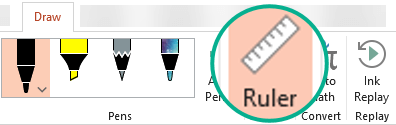
Tap the Draw tab, and you'll run into the Ruler on the ribbon.
Draw a line or align items
-
Select the slide where you desire to utilise the ruler.
-
Tap the Ruler
 on the Draw tab to arrive appear on the drawing surface of the slide.
 -
Position the Ruler at the bending you want.
-
Use ane finger to move the ruler up/down or left/correct.
-
Use two fingers to rotate the ruler to the angle you desire.
-
Use three fingers to rotate the ruler by 5-degree increments.
-
-
To describe a line Tap a pen or highlighter on the Draw tab, and begin drawing.
To marshal individual items Select each one in turn and drag the object until its selection handle snaps to the ruler.
To align a group of items at one time Multi-select the items by pressing Ctrl while tapping each detail in turn. Drag the set of objects until it snaps to the ruler.
A shape aligns to the ruler on its edge, whereas an object such as an icon, picture show, or text box aligns to the ruler on its bounding box.
Command the ruler with the mouse
Move the ruler by clicking and dragging with your mouse. To stop moving the ruler, release the mouse push button.
Rotate the ruler in one-degree increments by turning the scroll bicycle on your mouse. The ruler pivots where the mouse arrow is pointing. (Rotation requires a mouse scroll wheel; information technology doesn't piece of work with laptop trackpads.)
Control the ruler with the keyboard
If you don't have a touch screen, or if you prefer using your keyboard, employ these key combinations to manipulate the ruler after you've selected the Ruler push button to actuate it on the surface of your slide.
To control the ruler with your keyboard:
-
Tap the Ruler
on the Draw tab to make it appear on the drawing surface of the slide. -
Click the Ruler with your mouse.
-
Press Shift+F6 to enter ruler-manipulation mode.
-
Use a keyboard shortcut to dispense the Ruler:
Action
Key strokes
Move the Ruler up, downward, left, or right
Upwardly arrow, down pointer, left arrow, correct arrow
Rotate the Ruler in 15-degree increments
Hold down the Alt cardinal and tap the left or correct arrow once for each increase
The left arrow rotates the ruler counterclockwise; the correct arrow rotates information technology clockwise.
Rotate the Ruler in one-degree increments
Hold downwards Alt+Ctrl and tap the left or right arrow in one case for each increment*
The left arrow rotates the ruler counterclockwise; the correct arrow rotates it clockwise.
(A dark gray edge appears on the edges of the Ruler while you're moving it to indicate that ruler-manipulation mode is turned on.)
* The Alt+Ctrl+pointer key combination can also be used by Windows to rotate your display monitor. The monitor-rotation feature is controlled by the graphics menu of a estimator. If that characteristic is turned on for your computer, it volition have priority over the Ruler shortcut key, and the result will be that your monitor display volition exist rotated 90 degrees when you lot press Alt+Ctrl+right or left arrow key. You lot can reset your monitor rotation by pressing Alt+Ctrl+up arrow.
If you want to use the Ruler manipulation fundamental combination, plough off the monitor-rotation characteristic past right-clicking your estimator desktop and choosing a command such as Graphics Properties or Graphics Options. Find a Hot Keys command, and set information technology to Disabled. (The verbal organisation and names of these commands vary by manufacturer.) Afterwards you've turned off the monitor-rotation feature, the Alt+Ctr+arrow key combinations can exist used on both the Ruler and on shapes that have been inserted on a slides in PowerPoint.
Hide the ruler
-
Tap the Ruler
on the Depict tab to make it disappear from the drawing surface of the slide.
Requirements for the Ruler
| | This feature works on Windows tablets, just not Windows Phones. See Requirements below for more details. |
Draw a line or align items
-
Tap the slide where yous want to use the ruler.
-
Tap the Ruler
on the Draw tab to brand it appear on the drawing surface of the slide. -
Position the Ruler at the angle you want:
-
Employ one finger to move the ruler up/down or left/right.
-
Use 2 fingers to rotate the ruler to the bending you want.
-
Use three fingers to rotate the ruler by five-degree increments.
-
-
To draw a line Tap a pen or highlighter on the Draw tab, and begin drawing.
To align individual items Select each 1 in turn and drag the object until its choice handle snaps to the ruler.
To align a group of items at one time Multi-select the items by selecting one so tapping and holding it while you successively tap other items with some other finger. Drag the prepare of objects until it snaps to the ruler.
A shape aligns to the ruler on its border, whereas an object such as an icon, film, or text box aligns to the ruler on its bounding box.
Hide the ruler
-
Tap the Ruler
on the Draw tab to make it disappear from the cartoon surface of the slide.
Requirements for the Ruler
| | This feature is for all users on Windows tablets. |
| Applies to: | PowerPoint Mobile: |
| Operating system: | Windows 10, version 1709 or afterwards |
See Too
Depict straight lines or mensurate with the ruler in OneNote
| | This feature is currently available to Office Insiders. It works on the iPad, simply not the iPhone. Run across Requirements beneath for more details. |
Draw a line or align items
-
Tap the slide where you want to utilize the ruler.
-
Tap the Ruler
on the Draw tab to make information technology appear on the drawing surface of the slide. -
Position the Ruler at the angle you desire:
-
Use one finger to move the ruler upwardly/down or left/right.
-
Utilise two fingers to rotate the ruler to the angle you desire.
-
-
To describe a line Tap a pen or highlighter on the Draw tab, and begin drawing.
To align private items Select each ane in turn and elevate the object until its selection handle snaps to the ruler.
To align a group of items at once Multi-select the items by selecting ane and and then tapping and holding it while you successively tap other items with another finger. Elevate the set of objects until it snaps to the ruler.
A shape aligns to the ruler on its edge, whereas an object such equally an icon, picture, or text box aligns to the ruler on its bounding box.
Hide the ruler
-
Tap the Ruler
on the Draw tab to make information technology disappear from the drawing surface of the slide.
Requirements for the Ruler
| | This characteristic is for Office Insiders on the iPad. |
| Applies to: | PowerPoint for iPad: |
Source: https://prod.support.services.microsoft.com/en-us/office/draw-straight-lines-or-align-things-with-the-ruler-in-powerpoint-6222c9b4-2fdf-48f7-a3fd-1687fbe2bf84
0 Response to "Using the Boxes to the Right Draw"
Post a Comment